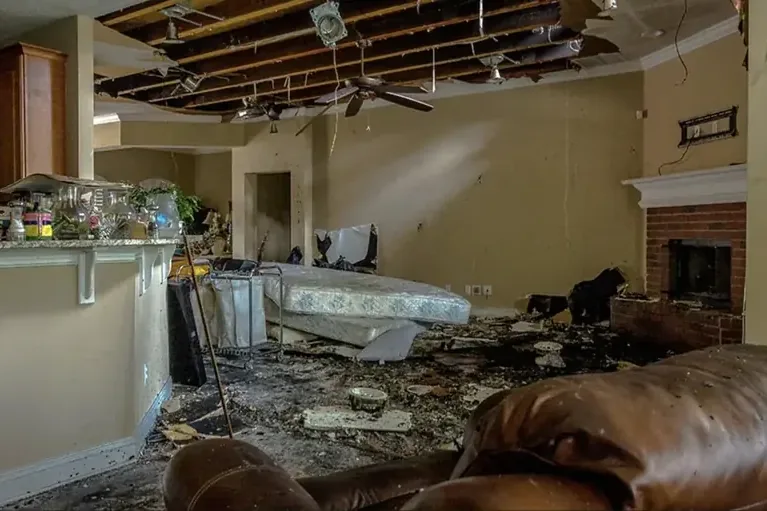
Montford and Albemarle Park are northern Asheville neighborhoods and local historic districts. When a ceiling leaks in a home with detailed interior finishes, the project needs photographs that preserve those details before repair access changes the room. The assessment starts with safe observation, source investigation and a description of the affected ceiling. A careful record helps the homeowner discuss drying, selective access and the eventual finish repair with each contractor involved.
Key takeaways
- Keep people away from a visibly unstable or sagging ceiling and report the condition.
- Photograph intact finish details from a safe location before access work changes them.
- Use room and ceiling location labels that stay consistent across contractor records.
- Ask how source repair, drying access and finish restoration will be coordinated.
Record the room before focusing on the stain
A wide photograph can show the ceiling in relation to doorways, partitions and fixed furnishings. That context matters when a close photograph shows only discoloration or damaged paint.
The property contact can identify the part of the ceiling from a safe position so the first inspection request explains both the visible problem and its location.
If the ceiling appears sagged or otherwise unstable, the area should remain restricted for professional assessment. The report can describe the visible change without anyone touching or opening the affected surface.
Keeping furnishings and occupants clear of the area also gives the responding contractor a better opportunity to evaluate access before work begins.
The ceiling leak assessment can then distinguish the visible finish from the surfaces that require further inspection. A homeowner should ask how the contractor will document concealed findings.
The original room photographs provide a reference if the scope expands after the source investigation or a controlled access opening.
- Capture the whole room from outside the affected area.
- Identify the stain relative to a doorway or partition.
- Report visible sagging before arranging access.
- Keep intact trim and ceiling details in the photograph record.
Preserve details that a repair estimate will need
An interior may include trim profiles, decorative edges or a surface texture that deserves its own photograph. The owner can ask the contractor to document these features where safe before removal.
The record should identify the component and its location so a future estimate can explain how that detail will be repaired or replaced.
Montford's and Albemarle Park's district context makes a careful finish record especially useful when planning work on an individual home. The property file should describe the materials actually found in the room.
A contractor can then discuss the observed finish assembly and the access proposal in terms the homeowner can compare with the photographs.
Any sample retained during authorized work should be labeled with its room and original position. A detached piece loses much of its value when no one can identify where it belonged.
The restoration and finish contractors can agree on a practical way to preserve relevant details while keeping the work area organized.
Connect the source investigation to the ceiling opening
The person investigating the source should report the inspected location and the finding that led to the repair. If access is required, the proposed opening should be explained before work changes the ceiling.
This gives the owner an opportunity to understand how the opening serves the investigation and how the surrounding finishes will be documented.
A photograph taken during access can show the relationship between the visible stain and newly exposed components. The project contact should label that image with the same room name used in the first report.
Consistent labels let the drying contractor trace the affected assembly as the investigation produces additional information.
Accessible water may also reach the floor below. The water extraction assessment should therefore include the receiving surfaces and any affected contents, with their locations recorded separately from the ceiling.
That distinction helps the repair file account for damage in different materials without compressing the entire room into a single ceiling entry.
- Ask the source contractor to describe the inspected component.
- Record the purpose and location of each access opening.
- Photograph exposed surfaces before the opening is covered.
- Include the floor and contents beneath the affected ceiling.
Keep drying decisions visible in the paperwork
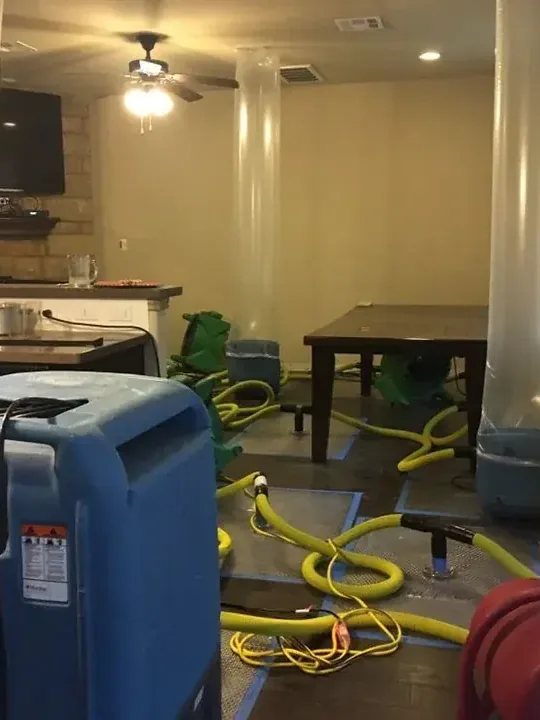
The drying plan should explain which parts of the ceiling assembly remain in place and how their condition will be assessed. A homeowner can ask the project contact to identify those parts on the room photographs.
This links a technical report to visible features and makes later progress updates easier to understand.
A structural drying record can also explain changes to equipment or access during the job. An adjustment should connect to a finding from the current inspection.
That gives the owner a reason for the change and helps the finish contractor understand how the work area developed before permanent repair began.
The household needs an agreed arrangement for entering nearby rooms while the affected area is restricted. The restoration contact should explain the equipment route and the condition of temporary coverings around openings.
Any alteration by another trade belongs in the project notes so the drying team can review the current arrangement at the next visit.
Compare ceiling repair proposals by component
A useful estimate identifies the portion of ceiling being repaired and the treatment proposed for adjoining finishes. The scope might include a removed surface, an exposed supporting area and detached trim, depending on the inspection.
Each component should be described clearly enough to compare with the photographs taken before and during access.
Where new ceiling material meets an intact finish, the estimate should describe the joint and any preparation around it. Two proposals can cover different portions of the same room.
Comparing their marked boundaries with the photographs makes those differences visible before decorative work begins or stored furnishings return.
The same discussion should account for items stored or protected during the project. A finish contractor needs to know what must remain accessible and which surfaces are ready for work.
Recording that arrangement helps the household plan the return of furniture after the remaining ceiling, wall and floor tasks have been completed.
- Match each repair component to its photograph or room sketch.
- Ask how the proposed finish meets intact surrounding material.
- Identify preparation required before decoration begins.
- Record the remaining access needs of each contractor.
Leave a record of the repaired room
After permanent repairs, a new set of room photographs can close the visual sequence. The same viewpoints used at discovery help explain where work occurred and what the completed surfaces look like.
Keeping those images beside the initial record gives the owner a useful reference for future maintenance or another contractor visit.
The closing paperwork should also identify the repaired source and the completed drying assessment. The owner can request a plain explanation of any remaining unfinished item.
That makes the distinction between completed restoration work and outstanding decorative work clear before the household treats the room as fully returned to normal use.
The Asheville room record should preserve the original ceiling details alongside photographs of the completed repair. Label the access opening, retained trim and replaced surface so a future contractor can recognize the work.
That short visual sequence is more useful during another ceiling inspection than an unlabeled folder of close views.
Questions
How can decorative trim be documented safely?
A contractor can photograph accessible intact sections during the assessment and label their positions on a room sketch. Close views of the profile are most useful when a wider photograph shows exactly where the detail belongs.
Should a homeowner open a stained ceiling?
Access should follow professional assessment of the ceiling condition and the suspected source. The owner can provide photographs and observations while leaving the opening method and work area controls to the responsible contractor.
What makes an access photograph useful later?
It should identify the room, the location of the opening and the exposed components. Keeping it with the prework image helps the finish contractor understand the assembly that existed before the surface was disturbed.
What belongs in the final ceiling repair file?
The file should include source findings, drying documentation, the agreed finish scope and completed room photographs. Those records show how the visible ceiling problem was investigated and how the affected surfaces were returned to use.